Are you just getting started with rifle shooting, or have you been hunting and target practicing for years? No matter your experience level, one of the most important parts of successfully using a rifle is ensuring it’s adequately zeroed.
In this article, we’ll explain what zeroing means and why it’s crucial for precision accuracy when firing a firearm. We’ll also guide how to adjust scope settings to incorporate this technique into your routine. With thorough preparation and practice, proper weapon maintenance like zeroing can go a long way towards improving accuracy and having more success at the range.
Understand the Basics of Zeroing Your Rifle Scope – What it is and Why it’s Important
Zeroing your rifle scope is essential to any marksman’s skill set, and it’s honestly more straightforward than you think. By zeroing a rifle scope correctly, you’ll be able to gauge your shots’ trajectory, resulting in noticeably more accurate shots. The process of zeroing involves making rotations of the rifle scope reticle using only a few minor adjustments. Whether you’re hunting or just shooting recreationally, taking some time to properly zero your scope will have a huge payoff.
Although zeroing in can be daunting if you’ve never done it before, anyone can quickly pick up this essential skill with some practice and research. With proper zeroing, you’ll be able to stand out from the crowd and shoot with consistency and precision. A Glock 19 light can be used to assist with sighting in.
Choose the Proper Shooting Distance and Set Up a Target
Once you understand the basics of zero, the next step is to find an appropriate shooting distance and set up a target. Ideally, it would help if you tried to practice at your intended shooting range to get an accurate gauge of how far away your shots will land. When setting up the target, make sure it’s big enough for you to easily see where each shot lands. This basic setup is crucial for getting reliable results when zeroing your rifle scope.
You can use bullets with different weights, shapes, or sizes to better understand how they work under varying conditions. For example, heavier bullets tend to have slower muzzle velocities and longer trajectories than lighter rounds. By testing out various types of ammunition during your zeroing process, you can get a better idea of which rounds perform best for your shooting style.
Select the Correct Reticle and Understand How to Adjust Windage and Elevation Settings
Once you’re all set up, the next step is to select the correct reticle for your rifle scope. The reticle should be carefully chosen based on the shooting distance and type of ammunition being used. Additionally, it’s crucial to understand how to adjust windage and elevation settings to properly zero the weapon. Windage settings are used to make horizontal corrections, while elevation settings are used for vertical adjustments.
With patience and practice, it will take a little while before you get a feel for how these settings work together, and you can easily adjust them as necessary. Take your time when zeroing your rifle scope – rushing will only lead to inaccurate results. Once you become comfortable with this process, eventually, you’ll be able to do it quickly and confidently.
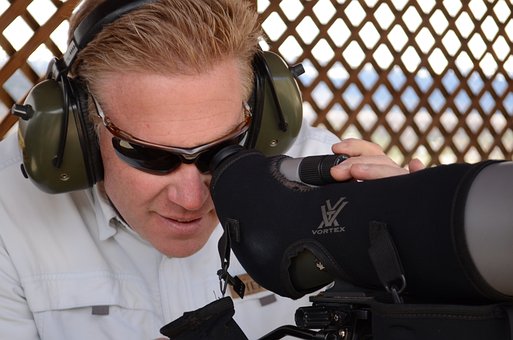
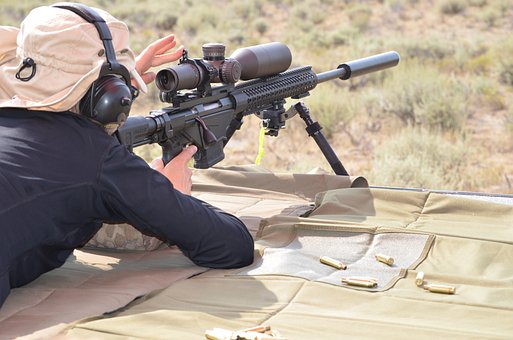
Get Comfortable With Safely Aiming and Firing Your Rifle at the Target
Once you have the basic settings dialed in, it’s time to get some practice on the range. Before you start shooting, make sure that all of your safety protocols are in place. It includes appropriately wearing ear and eye protection and keeping bystanders away from the line of fire.
Be sure to aim carefully and fire slowly to gauge how quickly your shots are landing. As you become more comfortable with the rifle scope, gradually increase the rate at which you fire until you’re able to consistently hit targets at your desired distance. If needed, go back and make any additional windage or elevation adjustments as necessary until each shot is dead-on accurate.
Adjust the Scope Until You Get Consistent Groupings at Your Chosen Range
Once you’re satisfied with the accuracy of your shots, it’s time to make any final adjustments. Keep in mind that while a single shot may be accurate, it doesn’t necessarily mean that all of your subsequent shots will hit their mark. You’ll want to repeat the shooting process several times to get consistent groupings at your chosen range.
If your groupings are still coming up short or too far away, go back and adjust the windage and elevation settings once again until you get satisfactory results. After this step is complete, you can be sure that your rifle scope is properly zeroed for accuracy and precision.
Check Your Adjustments are Accurate by Adjusting Positions Before Firing Again
Finally, you’ll want to check that your adjustments were accurate. To do this, move the rifle’s position slightly and then fire a few more rounds. If all your shots land in the same spot as before, you can be confident that your scope is zeroed correctly.
With a bit of practice and patience, it’s easy to learn how to zero your rifle scope for precision and accuracy. By following these steps, you’ll be able to make sure that each shot lands where it should – no matter what shooting distance or type of ammunition is used. Once you master this process, you’ll have an invaluable skill that will serve you well out on the range.