
You’ll need to design what level wall you want to build. Keep in mind that building beginner or intermediate courses is often cheaper and easier than attempting to build something more advanced. Make a few designs and play around until you find one that you think will really work. Only when you are sure that your design is functional, safe, and fun move ahead to the next step of the process. Additionally, you can use concrete walls to make the climbing wall.

Probably because we were working so quickly, we used the wrong size drill bit for all the t-nut holes and had to go back over each hole to correct the mistake. Climbing holds set on my Do-It-Yourself climbing wall. Bouldering is a form of climbing usually practised on small rocks and boulders, on artificial outdoor climbing structures, or at indoor walls. The reason rock climbers do sometimes have thicker-looking fingers is tied to both how often and how hard they train. Supporting so much weight on the fingers causes the tendons to grow, sometimes doubling in size. The bones also can thicken to help protect the digit from stress damage like microfractures.
If you want to seal, stain, or use textured paint on any of your pieces before assembling your wall, read the directions on your paint or sealant. It might be a good idea to apply them to your materials before your big building days since some types of pants or sealants need a few days to dry completely. In our case, Lowe’s was the cheapest option, but it was not the best. Because of the slow online stocking system, we were told our order was fulfilled when in reality, the store did not have some pieces of lumber available.
Table of Contents
Mounting A Climbing Wall To Drywall Over Lumber Studs
Having our frame and also have identified the stud’s position in our previous steps, place the panel against the frame. Be careful not to put any hold screws over your drywall. Make sure your header joists are level and square to each other, so your wall framework and plywood sheeting will fit correctly. It’s rare for residential walls, floors or ceilings to be perfectly square and level, so don’t base your positioning on the existing structure. Verify the relative position of the header joists with a level and tape measure.

One screw can hit a knot or void, using two screws increases the probability of making a solid connection dramatically. If this is a campus or training board and you are using a high-grade plywood, the raw wood finish is an excellent way to go. Simple and easy on the fingers, this is the preferred choice of many serious climbers. Just make sure all the corners and edges are nicely sanded and rounded out. This finish is harder to clean and will show off how much you’ve used your wall, but the wabi sabi / blackbelt approach has its own allure.
Wedging A Climbing Hold In Place
Besides, if you don’t have enough room inside the house, an outdoor climbing wall will do just as fine. There are numerous places you can decide to build your kid’s climbing wall. You can choose to make it indoors, like in the playroom, the attic, garage, or even a basement you hardly ever use.

The general idea is to get the wall height at least 2ft above your child’s height so they can do traverse climbing sideways. This also helps to prevent the climbing course from getting boring and repetitive. To make sure they could grab onto the perch with their claws I covered the plank with some BORRIS doormats, cut to size. The door mats make it a comfortable place for them to rest after the hard climb up to high places. I decided to make some anchors on the bottom end so it doesn’t come off the wall when the cats hang onto it.
If you are a homeowner and want a permanent fixture for climbing, consider building your wall for added support. This makes it easier to build and design your wall since you have spatial restrictions. Look for a location in your home where you have enough space to maneuver and climb off the ground. Grab the circular saw and make a cut along one of your pieces of plywood to create a sheet that’s 8 feet wide and the same height as the 2x4s you just cut.
Properly Tightening The Bolt On A Climbing Hold
Your fall zone must extend far enough to protect you from swinging falls or dynos. If your wall is steep, this could mean that you will need to extend your fall zone several yards past the edges of the wall. Turn the panels over and knock off any splinters from the drilling.
Then hang some storage shelves at the back to hold your equipment and other items. To be perfectly candid, I’m an average carpenter at best. So, I didn’t have woodcutting or related skills under my belt. Building a homemade climbing wall is easier than you think.
The rug itself is pretty heavy and you need to count in the weight of your cats, so make sure your connections can hold the weight. I screwed 6 screw hooks into the ceiling at regular intervals, to hang the rug from. What I did was attach a large sisal rug to the wall and made a landing platform above the door next to it.
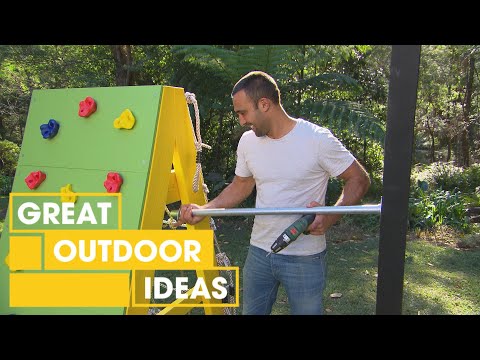
Hold prices are almost entirely dictated by the amount of material in the hold, so make sure you’re considering like-sized holds when comparing prices. Make the outdoor support structure or indoor wall frame. Then start plywood-sheeting by placing the t-nuts that’ll be bolted onto the wall on your newly painted, predesigned plywood sheets. Even the simplest home climbing wall designs will require a basic skill set including measuring, cutting, drilling, and installing simple fasteners.
For outdoor walls, you’ll need to make a supporting wall and waterproof literally everything. Regardless of how good a job you do, the holds won’t stay as long as they would indoors. Although indoor walls come with their own subset of problems. A look at some available options for purchasing home rock climbing wall products, and reasons one may be better for you than another. Detailed information on how to build a climbing wall that is rock solid.
Looking for a fun way to stay active at home, a jungle gym for little ones with endless energy, or a chance to create your own personalized climbing routes? Your answer is to build your own home climbing wall! While building your own climbing wall at home is not for the faint of heart, the effort and money you put into a DIY climbing wall can be well worth it. Don’t limit yourself to problems that just go from the bottom to the top. You don’t have a whole lot of wall to work with, so try to set some problems that traverse or down-climb. One of the easiest ways to come up with long problems that take advantage of every square foot is to pair up with your training partner and play the stick game.
For the staggered grid method, measure along the short side of your sheet, and make a mark at 4 inches, then every 8 inches from there. Do the same at the other end, and then snap a chalk line across the sheet to connect your marks. Lay your tape measure along a line, and put an X at 4 inches.


